Using tasks in the Workflow
Tasks are added and configured in the Workflow Designer.
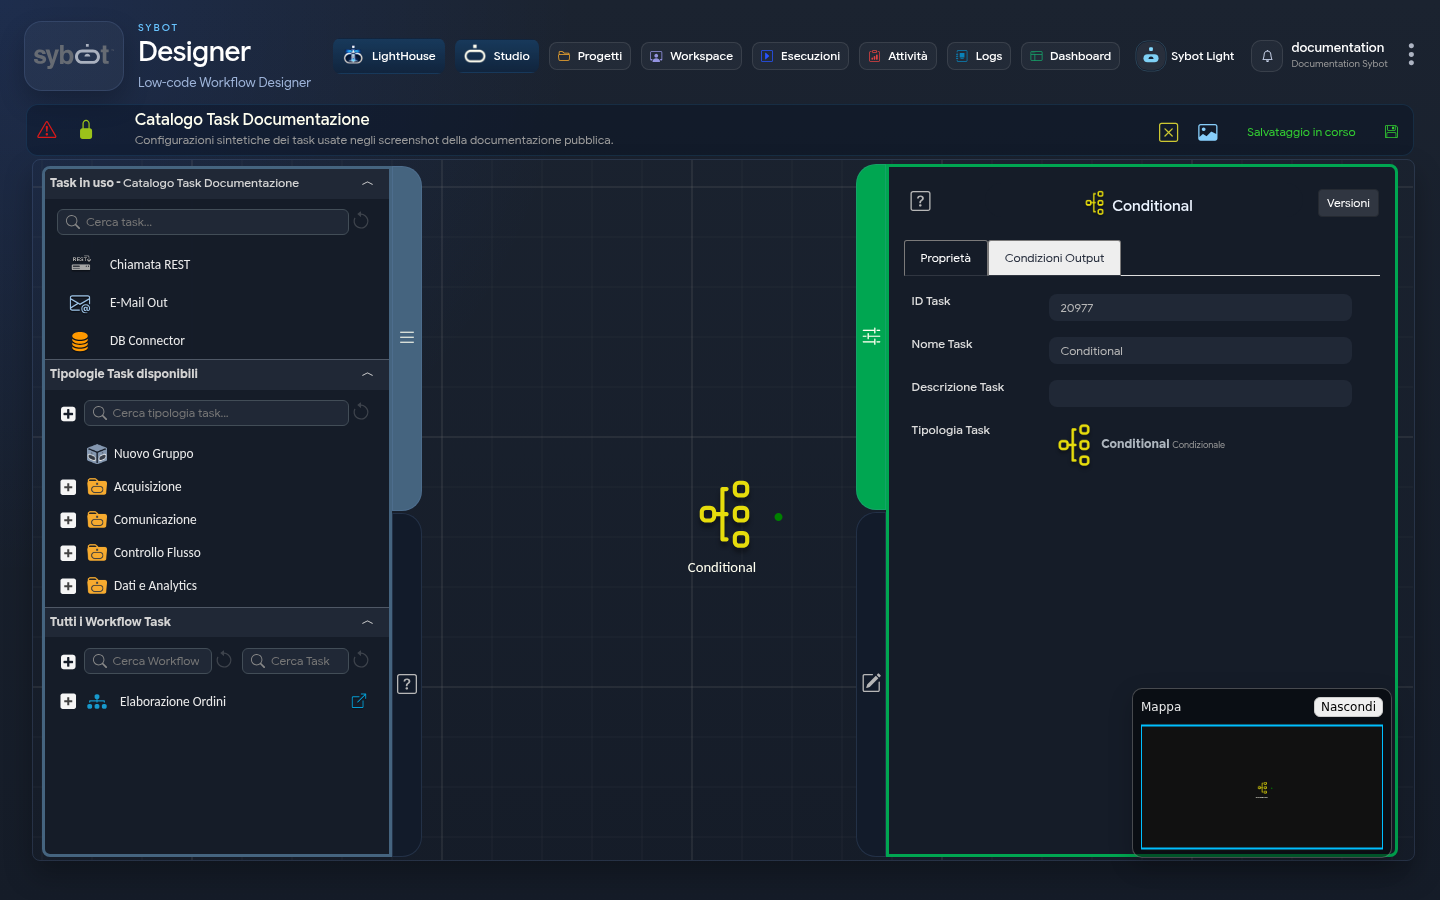
Adding a task
- Open the tasks panel on the left.
- Search by name or open the desired category.
- Drag the task type into the diagram.
- Select the newly created node.
The panel distinguishes between available task types, tasks already associated with the workflow, and reusable elements when applicable.
Properties
The Properties tab identifies the instance in the diagram. Use a name that expresses the result of the step, not just the technical type. The description should clarify any constraints or non-obvious choices.
Configuration
The Configuration tab contains the task-specific parameters. A value can be:
- entered directly;
- obtained from a workflow parameter;
- obtained from the output of a previous task;
- composed using an expression.
The parameters menu helps insert valid references. Do not copy passwords or tokens into visible fields when the task provides protected values or pre-configured connections.
Output Conditions
The Output Conditions tab defines the exit paths. Depending on the task, the following may be available:
- default path;
- custom conditions;
- alternative path;
- error or exception handling.
Connect each condition to the correct task and verify that no required case remains without a destination.
Node Operations
The task's context menu allows you to duplicate, disable, remove, or manage the instance, depending on the state and permissions. Removal from the diagram and permanent deletion are not always equivalent: read the confirmation shown by the interface.
Verification
- save after every consistent modification;
- check validation indicators;
- test one path at a time;
- inspect outputs and logs;
- also verify alternative conditions and expected failures.